Some ideas on field measurement of stratigraphic sections
This post is part of the How To… series
Next to measuring dips and strikes, this is probably the most important task you will undertake as a field geologist working in sedimentary rocks (and I include well-site stratigraphy in the general term “field work”). Stratigraphic sections provide you with:
- the boundaries of rock units (formations, stratigraphic sequences, cycles, sedimentary facies).
- The age of rock units (using fossils and other dateable rock or mineral components).
- The presence of hiatuses such as unconformities and disconformities.
- The vertical extent of depositional units and if adjacent sections are available, the lateral extent of these units.
- The juxtaposition of depositional units (facies, depositional systems) based on bed thickness, composition, sedimentary structures, fossils.
- Stratigraphic trends such as fining upward successions.
- Nearly all sedimentary rocks occur within much larger and grander sedimentary basins; your stratigraphic section is a sample of that basin. Stratigraphic sections added piece by piece, like a jigsaw puzzle, will give you a more complete picture of the basin.
“What is your weapon of choice, Master Baggins?”
For this task you will need (in addition to all the other stuff, like a hammer, boots and lunch):
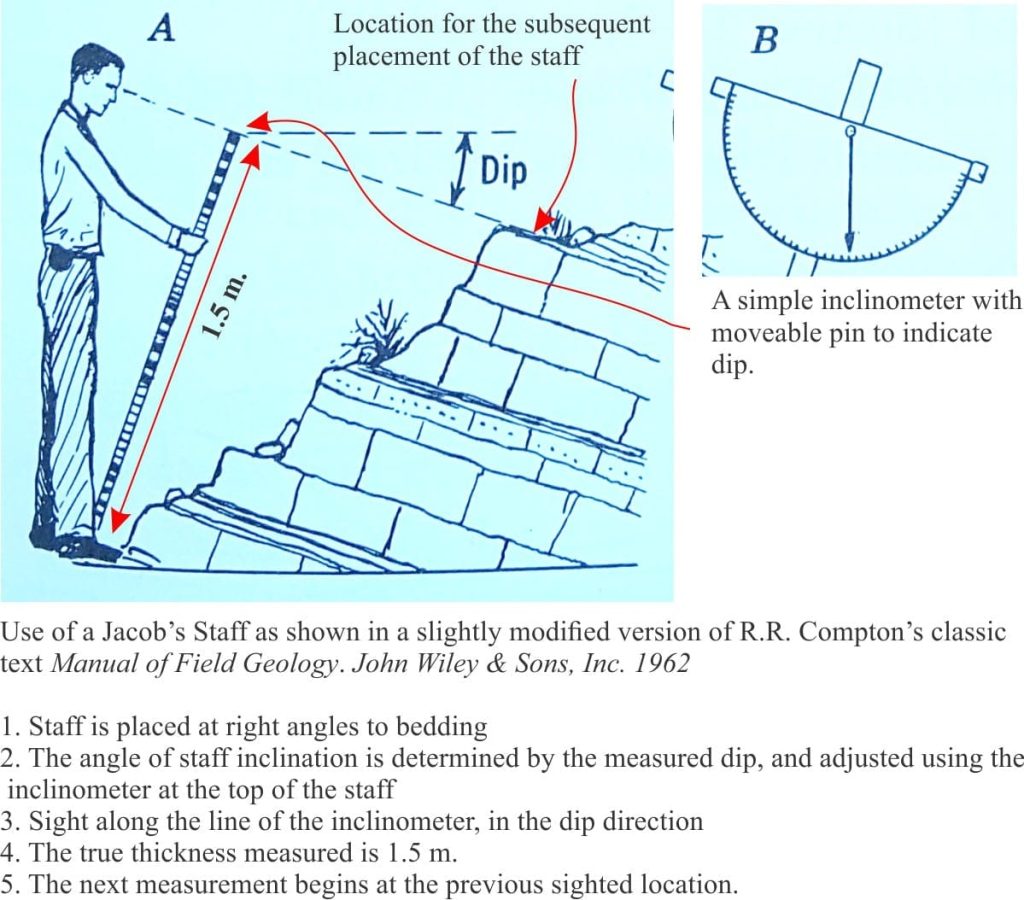
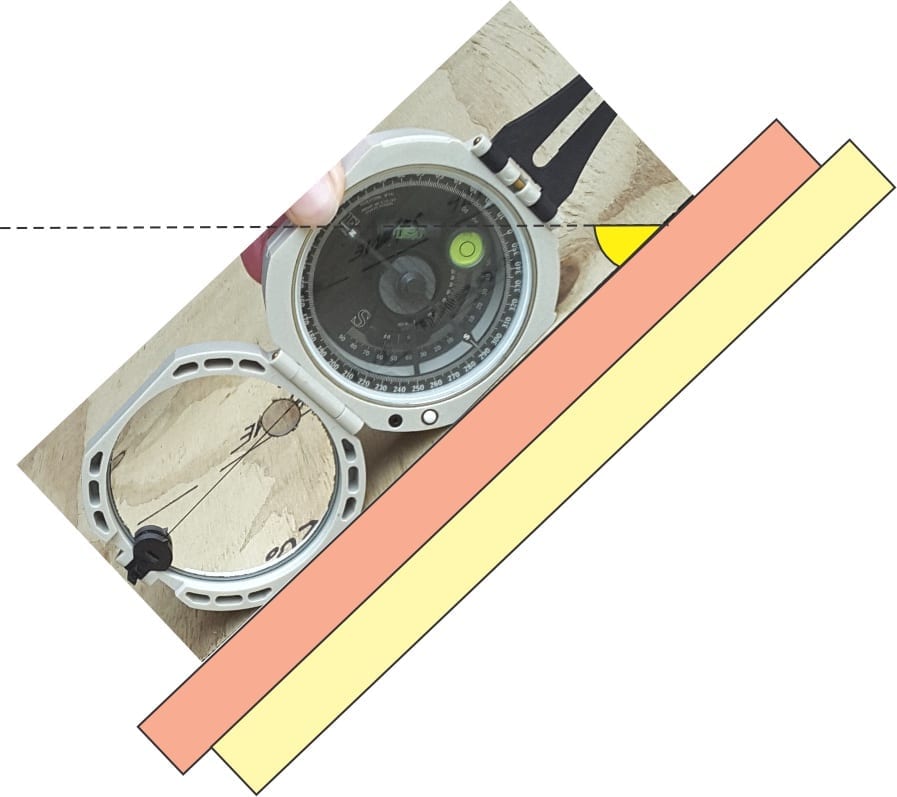
- Jacob’s Staff; 1.5 m is a good length, marked off in 10 cm or finer increments. Make sure it has a decent inclinometer and bubble level attached with a lock-nut so that it doesn’t fall off (if it does fall off it is bound to drop into a crevice or down a cliff). The inclinometer is set at the local dip (that you have already measured). This is one of the best pieces of equipment ever invented – it dates to the 14th century where it was used for geographic and astronomical measurements. It allows you to measure true bed thickness directly. Check the dip regularly.
- A tape measure (if you cannot find or make a Jacob’s Staff); a tape measure is useful for measuring the thickness of thin beds and crossbeds. You will need to correct each measurement for dip.
- A compass for strikes, dips , paleocurrent measurements, and structural attributes, The compass inclinometer can also be used on the Jacob’s Staff.
- Topography maps at a scale suited to the task at hand, depending on the scale of your section and the scope of your field mapping. And, if you can get them, vertical aerial photographs; satellite images may also work, again depending on the scale of your project (e.g. LANDSAT).
- Water-proof field note book and more than one pencil, and a dry-bag to put them in. It is a good idea to have one of these even if you use a digital notebook-tablet – this kind of redundancy is recommended because there WILL BE accidents with your field notes and maps. An umbrella may look foolish, but I assure you they come in handy – particularly those wrap-around bubble types.
- Camera. Take lots of photos.
Health and safety
Most teaching and research institutions, and companies actively involved in field work will have an exhaustive list of potential hazards and safety concerns. The relevant safety issues will depend on the type of terrain you are working in, weather conditions, wild life, the degree of isolation (are you going out for the day or an extended period?), communications (are mobile phone, satellite, or radio communications available), mode of transport, personal health concerns (are you allergic to bee stings, snake bites, crocodiles?). If your access to outcrops is via boats, or your field site begins on the sea floor, there will be an additional set of safety requirements such as life jackets, water conditions, tides, marine weather reports, ports of refuge, spare engines and fuel. All these potential hazards and health issues need to be assessed before field work begins.
Before you start
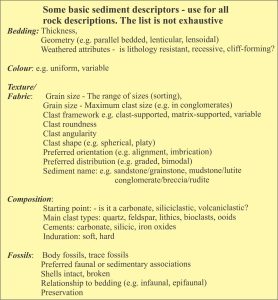
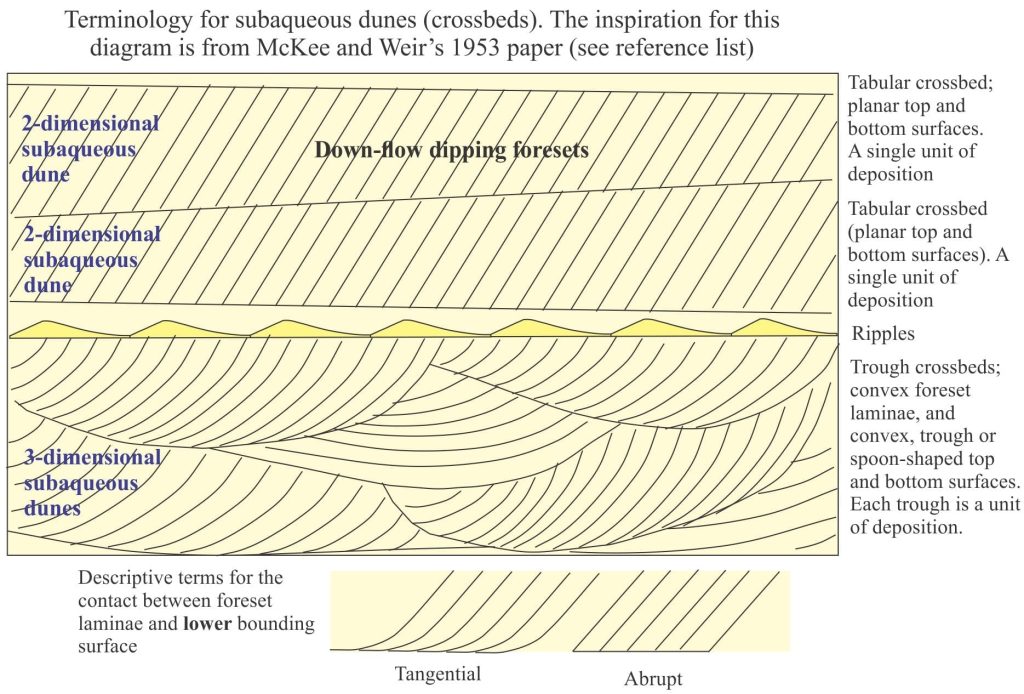
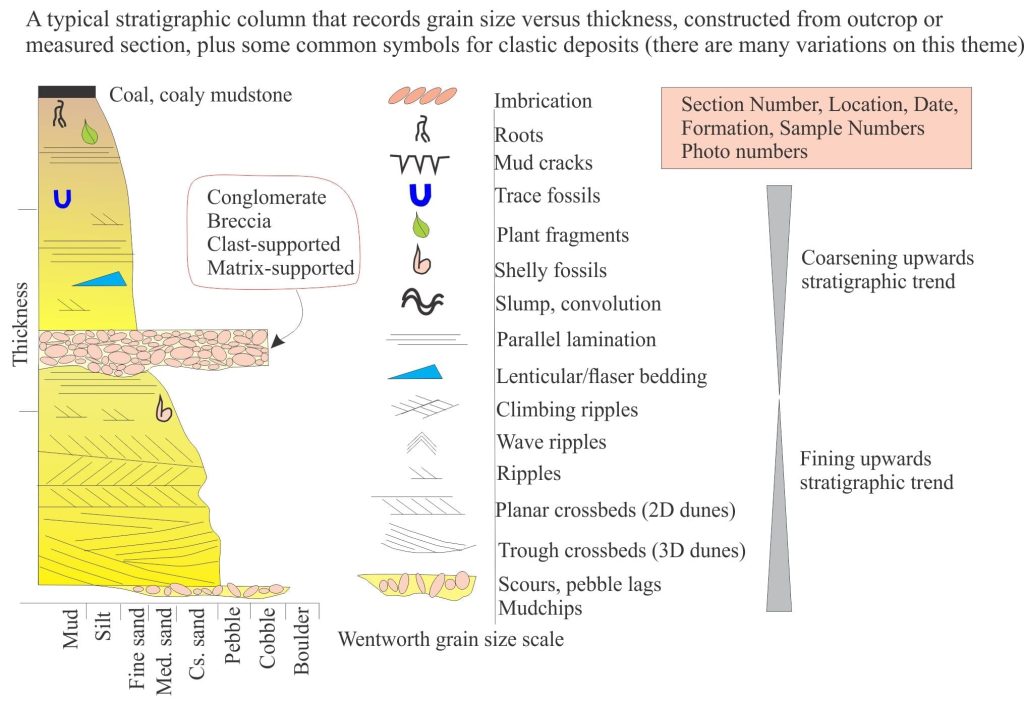
The following two diagrams list some basic sediment descriptors and terminology. These are your starting points for describing and interpreting sedimentary rocks and sedimentary structures in outcrop, hand specimen, and core. Digital field note books will have a selection of descriptors built into their software. If you use actual pencil and paper, tape your list of basic descriptions on the inside cover of the notebook.
Outcrop descriptions:
Here are a few links to annotated images of outcrops.
Sedimentary structures: Alluvial fans
Sedimentary structures: coarse-grained fluvial
Sedimentary structures: Fine-grained fluvial
Sedimentary structures: Mass Transport Deposits (MTDs)
Sedimentary structures: Turbidites
Sedimentary structures: Shallow marine
Lithofacies descriptions and interpretations
This page has links to sedimentary lithofacies descriptions. Additions to the lithofacies list is a continuing project.
Getting started
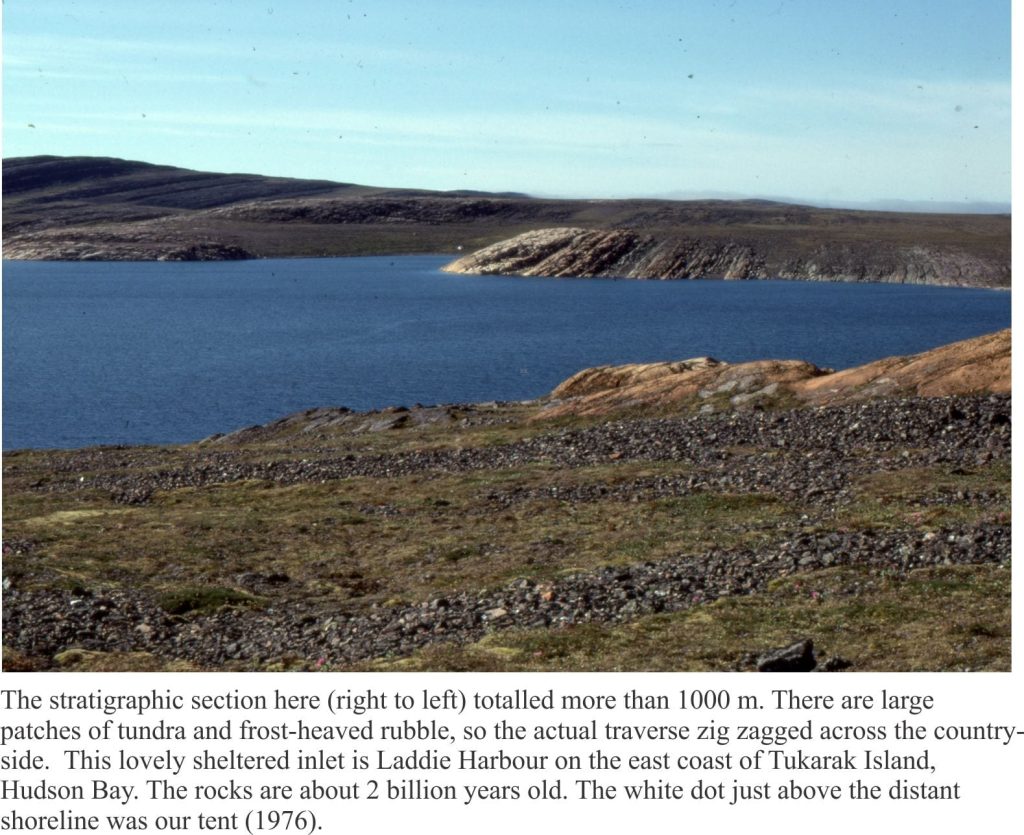
- If possible, decide beforehand where the section traverse should go to take advantage of the best, most continuous exposure, noting areas that may be difficult or even dangerous to work. Aerial imagery is a good place to start this decision-making process.
- Locate the section (top and bottom) on a topography map (grid references), aerial photo or image. There’s no point measuring the section if you cannot later locate it geographically. Add the date and other relevant information.
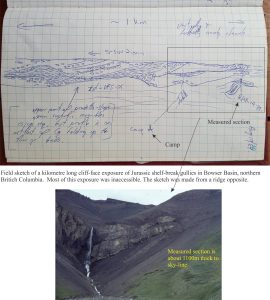
- Before launching at the outcrop, it is a good idea to stand back for a more expansive view of your intended traverse. Things to look for include potential hazards, ease of access, changes in the quality of exposure, and any large-scale stratigraphic or structural features that can be checked when you are face to face with the rocks. When you have finished measuring the section it pays to look back again, from a distance, checking for a stratigraphic trend or structure you didn’t observe the first time.
- Briefly describe the condition of the exposure – steep slope or shallow; rubbly; are there vegetation or soil covered areas? Note the weather conditions.
- At the outcrop determine stratigraphic way-up. We usually measure a section from oldest to youngest (borehole stratigraphy is measured the other way).
- Decide how you will measure and record the section. Are you interested in detail and hence measure bed by bed, or do you have one day only to record a two kilometre-thick section, in which case you will probably measure packages of strata? The choice is a bit arbitrary and depends on the nature of the project and its desired outcome.
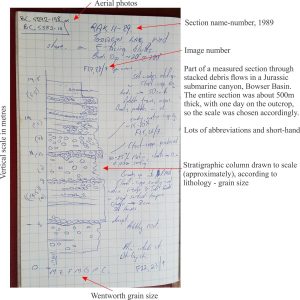
- Decide how you will record your observations: notes, sketches, stratigraphic columns, photos, samples. My own preference is to draw a stick-like stratigraphic column as I work through the section, adding side notes and symbols for sedimentary structures, fossils, samples etc. I like this method because I can begin to visualize any stratigraphic variations such as coarsening or fining upward trends. The scale for this column will depend on the level of detail you require. There are Apps and programs that will automate this process, if you’re using digital devices. BUT… keep in mind that you are not just recording the stratigraphic section – you are trying to see through it. Automated field tasks are fine for speeding up the recording process, but nothing can replace manual, pencil sketching to help you understand the problem in front of you. Don’t use the excuse “but I can’t draw”. Field sketches are not meant to be works of art. They are supposed to be quick renderings of the outcrop, hillside or whatever, capturing the ingredients that are essential to geology and landscapes. You do not need to reproduce the landscape with Andrew Wyeth precision. Annotated field sketches also add meaning to photographic images; if light conditions are poor they may be the only record you have.
- Chose a convenient scale for the stick column – one that allows plenty of notes. I find it necessary to vary the scale from time to time, if I want more or less detail in parts of the section. Any changes in scale can be accounted when redrawing the column to a common scale.
- Most field geos use some form of shorthand for recording their observations, particularly when there is a lot of repetition. This comment also applies to use of symbols, for example different kinds of crossbed, trace fossil, or bed contact. Some institutions will have their own set of symbols and abbreviations. What ever system you adopt, make sure it is used consistently. Keep in mind that the field notes are primarily for YOU. You can redraw stratigraphic columns and sketches to make them legible for others, or for publication.
- Decide ahead of time the kinds of samples you need to collect – macro/microfossils, petrographic, radiometric dating. Will you need materials to wrap delicate fossils, or tough bags for sharp-edge rocks? Make certain that sample labels are waterproof and won’t rub off after a day of rattling around in your backpack. It is imperative that samples are keyed to the correct stratigraphic unit.
- Take lots of photos. Link these images to your columns, notes and sketches. There is no such thing as ‘too many images’. Take close-up photos before you hack the outcrop, structure or fossil with your hammer. No one will be interested in a photo of a pile of rubble. Backup your images when back at camp.
- It is unlikely your section will traverse a nice straight line; you may need to move laterally to find good exposure if the outcrop is covered by scree, snow etc. It is important when shifting the line of section that you work from the same stratigraphic horizon. Mark the progress of the traverse on a map or aerial image.
- If the line of traverse shifts sideways a significant distance, then it should be considered a new section and located-annotated accordingly. There is no set rule for this. Whatever shifts in the line of section are deemed necessary, they can be illustrated on a cross-section that shows the relative positions of the stratigraphic columns.
- At the end of the section or back at camp, take photos of your notes, columns and sketches – as backup. Then backup all your images.
Here is a typical ‘stick’ stratigraphic column in more or less final form with a few symbols in common use (not encyclopedic)
At the end of your field day, back at camp with a cup of tea or gin-and-tonic, it is important to review your notes, images and samples. Field notes and sketches tend to be messy, crossings out, smudged with dirt and rain drops. If your field notes are immaculate then you have probably spent too much time on the outcrop or section. When back at camp, redraw the stratigraphic column, adding any additional notes or questions about some aspect of the geology that needs checking. At this stage you can spell out or explain the abbreviations and add lists of symbols. This process may seem redundant, but it is redundant only if you learn nothing from it.
Plotting the stratigraphic section and annotating it with all the observations (and questions) is very satisfying. Here you have the basis for some initial interpretation of paleoenvironments, sedimentary facies and paleocurrents. However, your interpretations will only be as good as the quality of the data collected. You can never collect too much data!
With a bit of luck, the adjacent section you measure the following day will make the interpretations more complicated (and therefore more interesting).
Some useful posts in this series:
Sedimentary structures: Turbidites
Determining stratigraphic tops
Identifying paleocurrent indicators
Measuring and representing paleocurrents
